 [Photographs: Vicky Wasik]
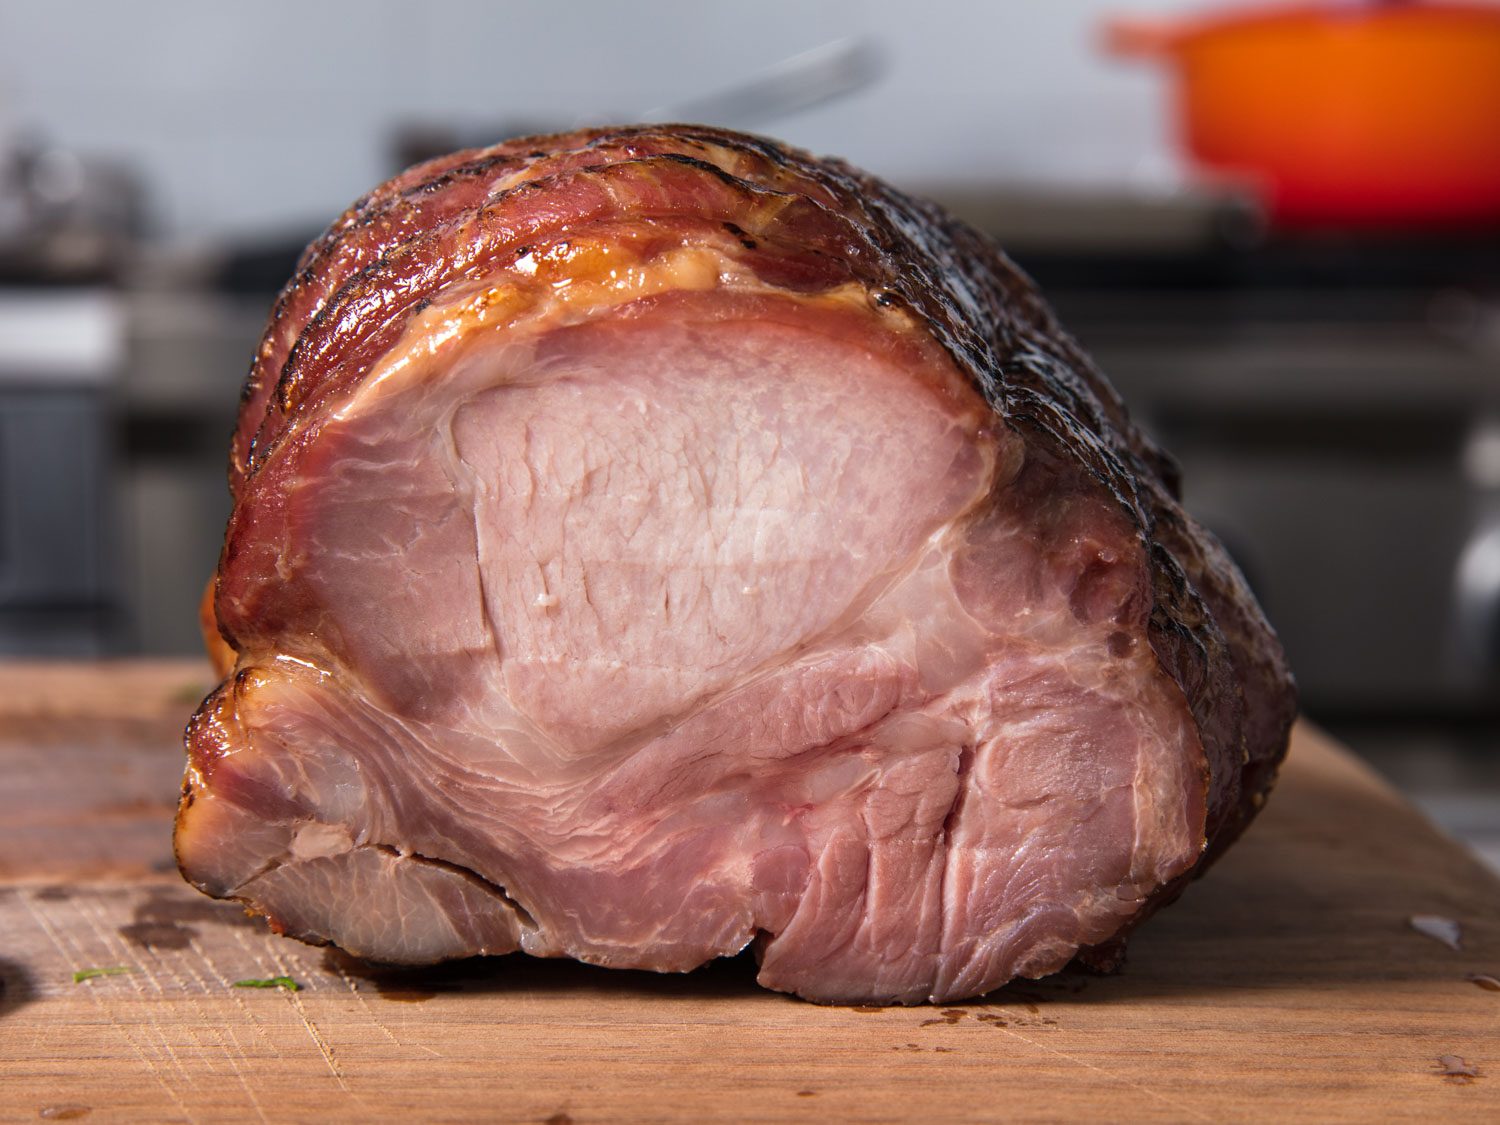
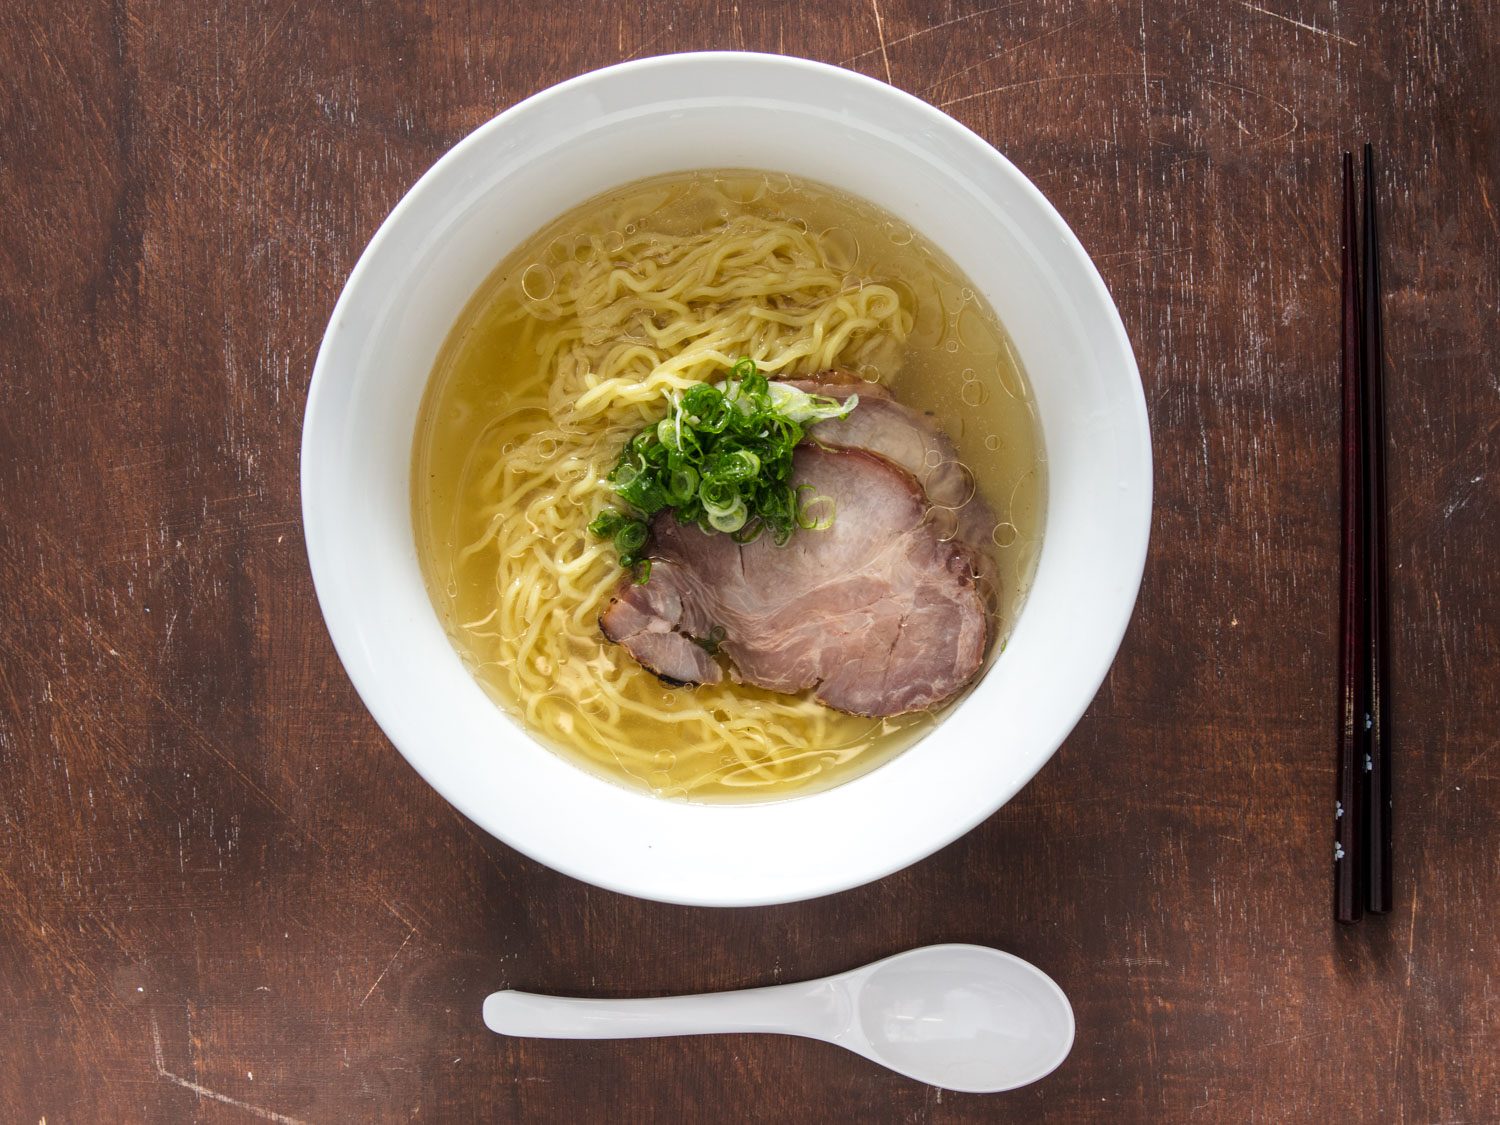
It sometimes feels like everyone who loves ramen is obsessed with chashu, the roasted or braised slices of pork that seem to adorn almost every bowl. What’s curious to me is that chashu in the United States seems to most often consist of slices of braised pork belly so soft that they fall apart in your mouth, while in Japan, chashu made from roasted or braised pork shoulder is far more prevalent.
Chashu in Japan is also, generally speaking, cooked to have some texture, some bite. I interviewed the talented butchers Jocelyn Guest and Erika Nakamura a while back, and whenever I think of the soft meat and softer fat of the belly chashu that appears to be standard here, I think of Guest saying, “I like to chew my meat.” Well, I do, too.
With that in mind, I set out to devise a recipe for those of us who prefer to chew the meat that comes in our bowls of ramen. Kenji long ago developed an excellent braised-belly recipe for those who like meltingly soft pork—it even has an added bit of texture because he calls for leaving the belly’s skin on—so I thought I could do one for pork shoulder, hitting two of my preferences for chashu in one go.
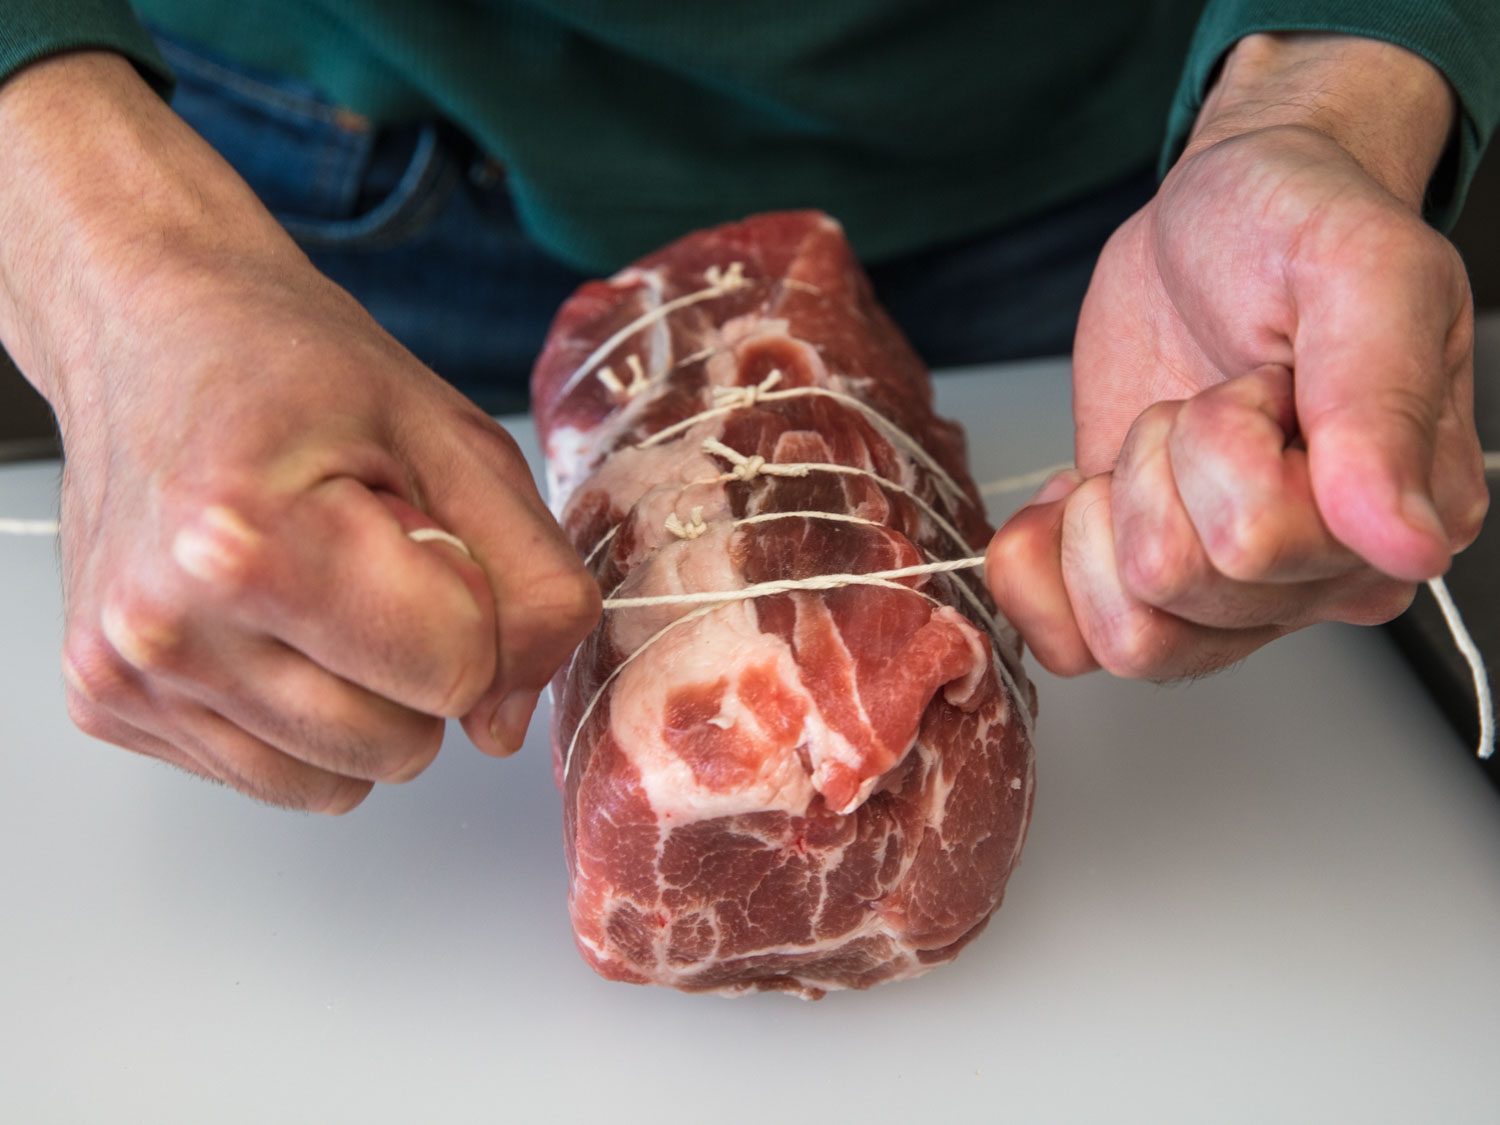
Funnily enough, though, Kenji’s recipe works just as well for pork shoulder as it does for belly, and it’s flexible enough to accommodate a range of preferences with respect to the softness of the meat. The process is identical: Tie up the meat, put it in a Dutch oven with flavorful liquid, cover it partially, and place it in a low oven for a couple of hours. If you prefer chewier pork, cook it for less time; if you prefer softer pork, cook it longer.
But even with these options, braising still locks us into a fairly narrow range of results. More specifically, the pork is always cooked well-done, even on the short end of the cooking-length spectrum.
Hop on a plane to Japan, and, after visiting enough ramen restaurants, you’ll likely discover that a well-done piece of braised pork, whether shoulder or belly, is only one of the forms chashu takes there. Rare pork shoulder chashu, for instance, is now something of a fad in Japan, where the aversion to eating pink pork isn’t as widespread as it is in the United States (from a food-safety perspective, there’s not much risk to eating rare pork).
Rare pork may not sound appealing (or maybe it does?), but if we turn to other techniques besides braising—like sous vide, or roasting using the reverse sear—we can take advantage of more precise temperature control, opening up the possibility of many different doneness levels and textures.
You could cook the pork medium-rare or medium or medium-well, or anywhere in between, depending on your preference. You may not like all the possible results—I’m not a huge fan of medium-rare sous vide pork; more on that below—but almost certainly, these techniques offer something for everyone. The challenge for me was working out the details of each approach, so I spent some time experimenting with cooking pork shoulder to a variety of temperatures, using a variety of methods, to figure out which were best.
The Benefits and Challenges of Using Pork Shoulder for Chashu
 pressure cooker chile verde), or grind for meatballs, or use however else you like.
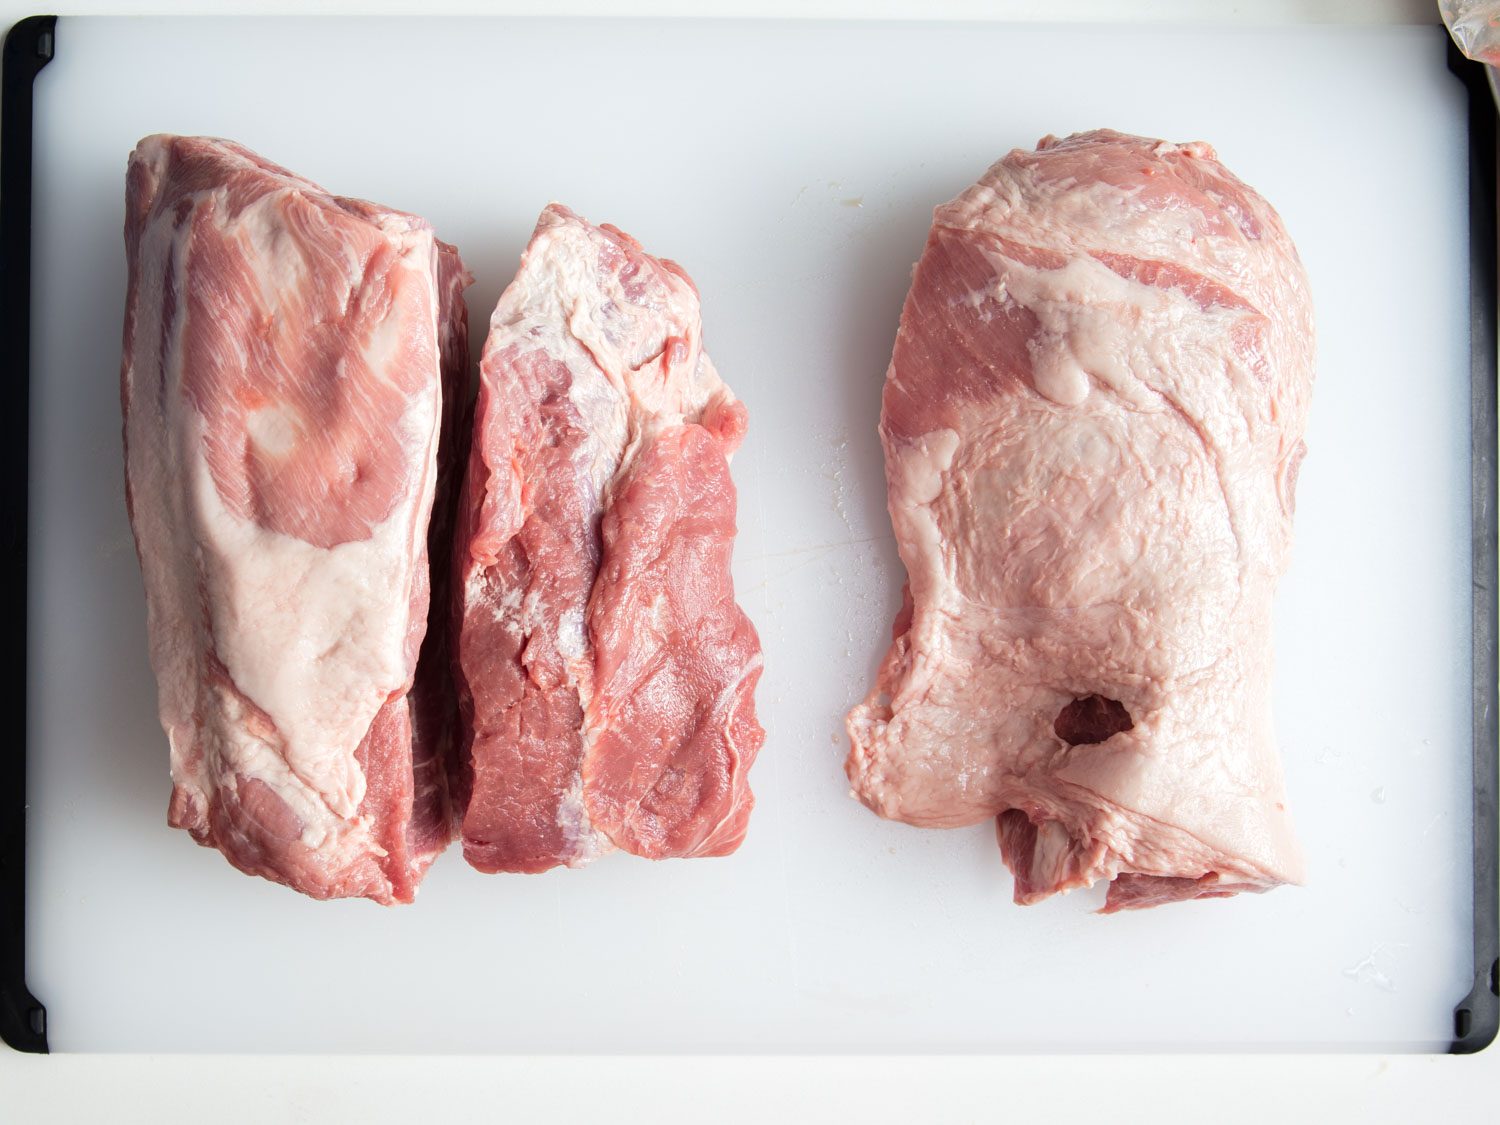
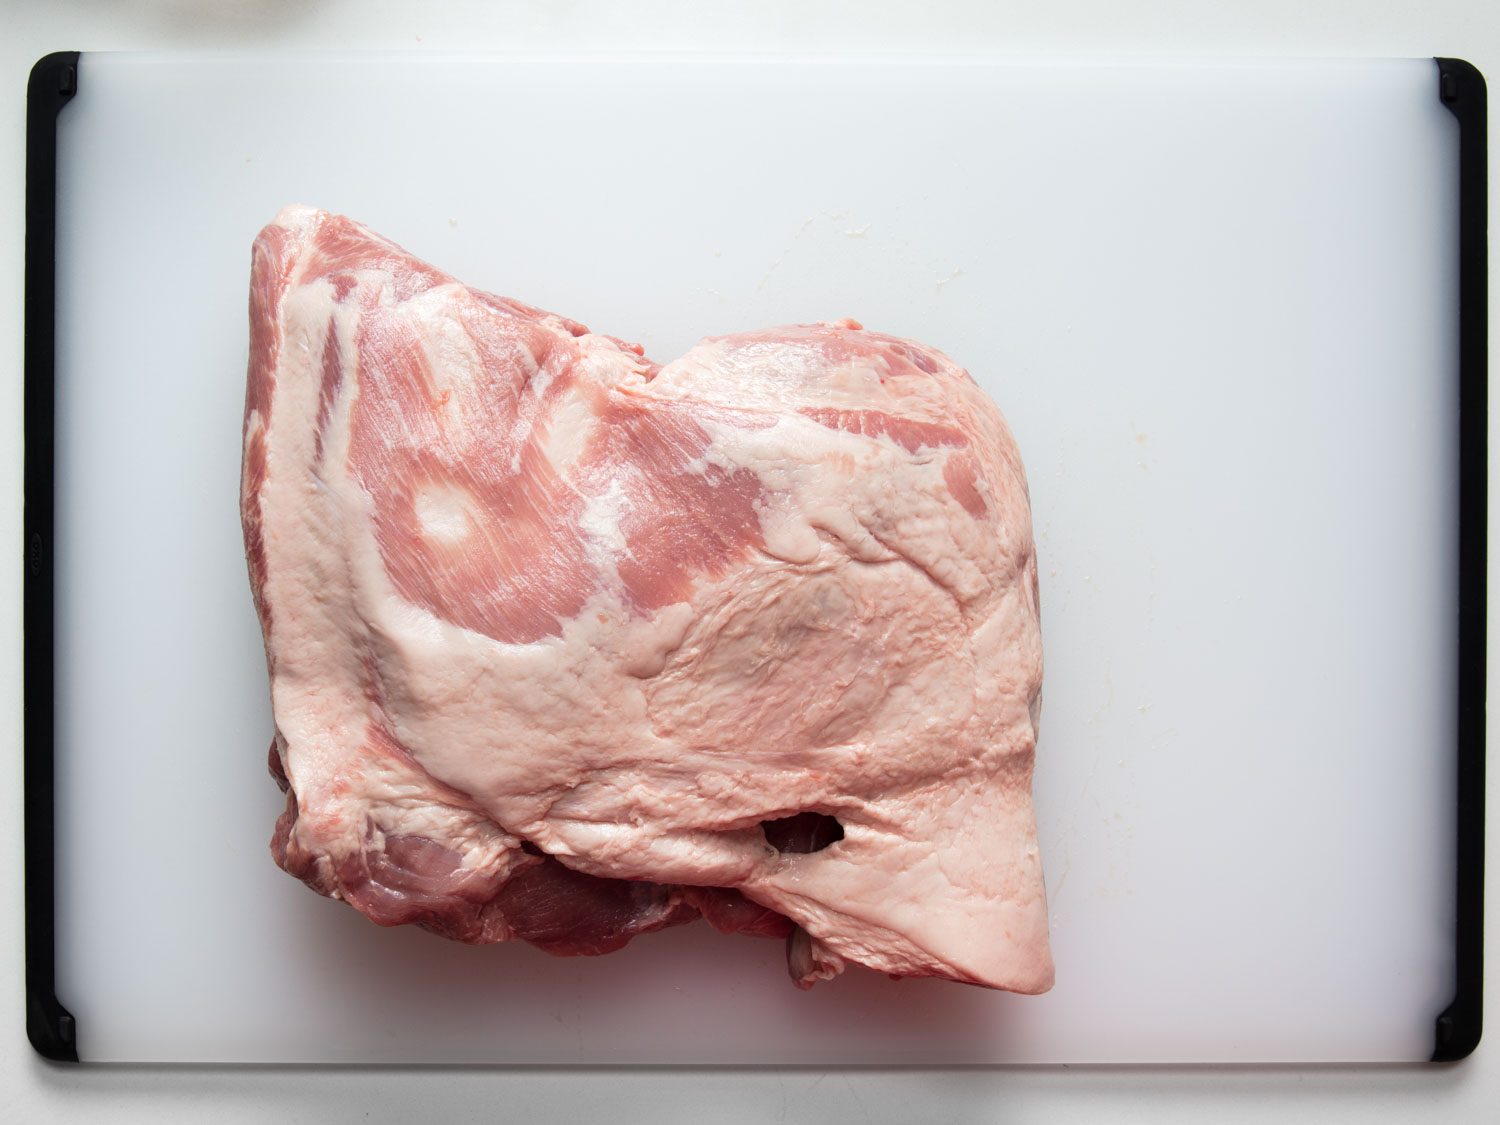 Whole boneless, skinless pork shoulder, with boned-out section on the right.
The picture above is of a boneless pork shoulder that I bought at my local supermarket. If you could reach into the screen and grab this slab of meat, flip it around, and examine it, you’d notice that there’s a cavity passing through a section of the shoulder where the bones used to be. In this photo, that cavity runs vertically through the right half of the cut, though you can only see one small opening near the bottom where a bone used to be.
I prefer to make my chashu from the other side, a nice block of solid meat where there was no bone. (Again, if you were able to examine this cut in person, it’d be easier to see the holes left by the bones, and note where they aren’t.)
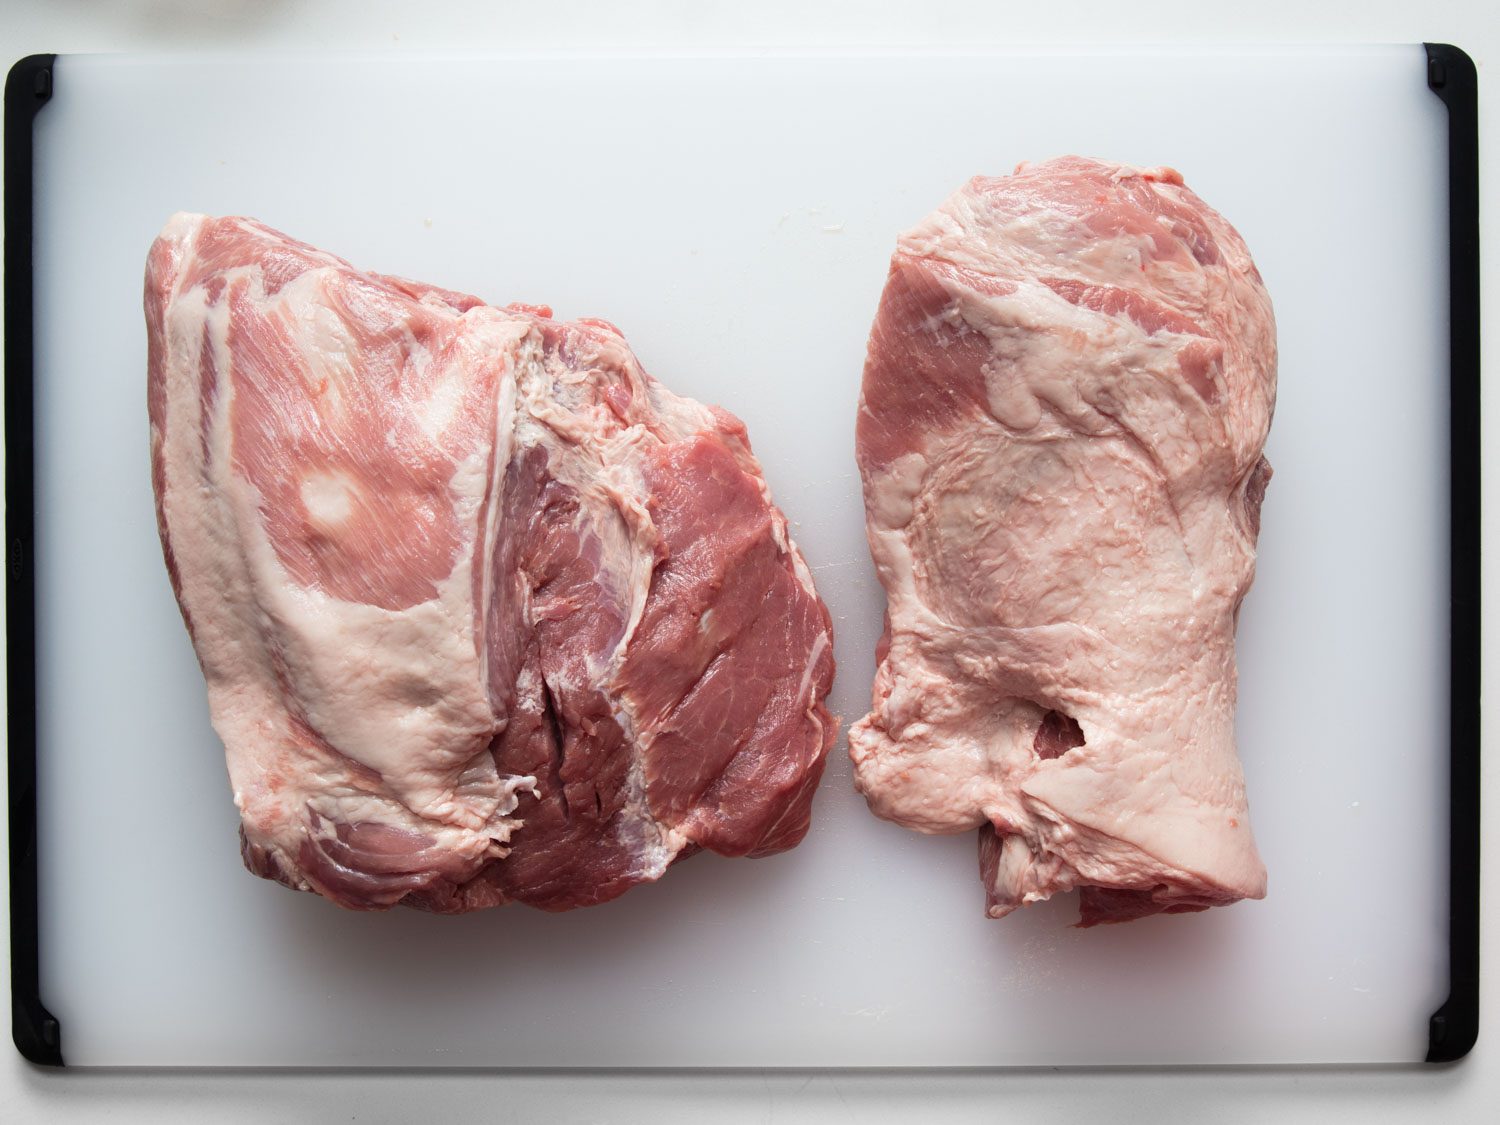 Left: section of pork shoulder roast that is solid muscle. Right: section of pork shoulder that has been boned out.
Technically, you could use every part of the shoulder for chashu, including the part hollowed out from deboning, but that’s more effort than I’m willing to expend—the deboned portion is too unruly to easily tie up into a neat bundle. As I mentioned above, it’s easier to save that part for another use.
The first step, then, is to remove the deboned portion of the shoulder from the rest of it. There’s a natural seam to cut along, though it runs at an angle. If you start with the shoulder’s fat-cap side up and the deboned portion on the right (exactly how I have it positioned in the photos), you’ll make a shallow vertical cut along this seam, then follow the thin bands of muscle deeper into the shoulder while edging the knife more and more to the right—ending up closer to where the deboned hollows are. You are, in essence, trying to maximize the size of the solid slab, while trimming off the deboned part.
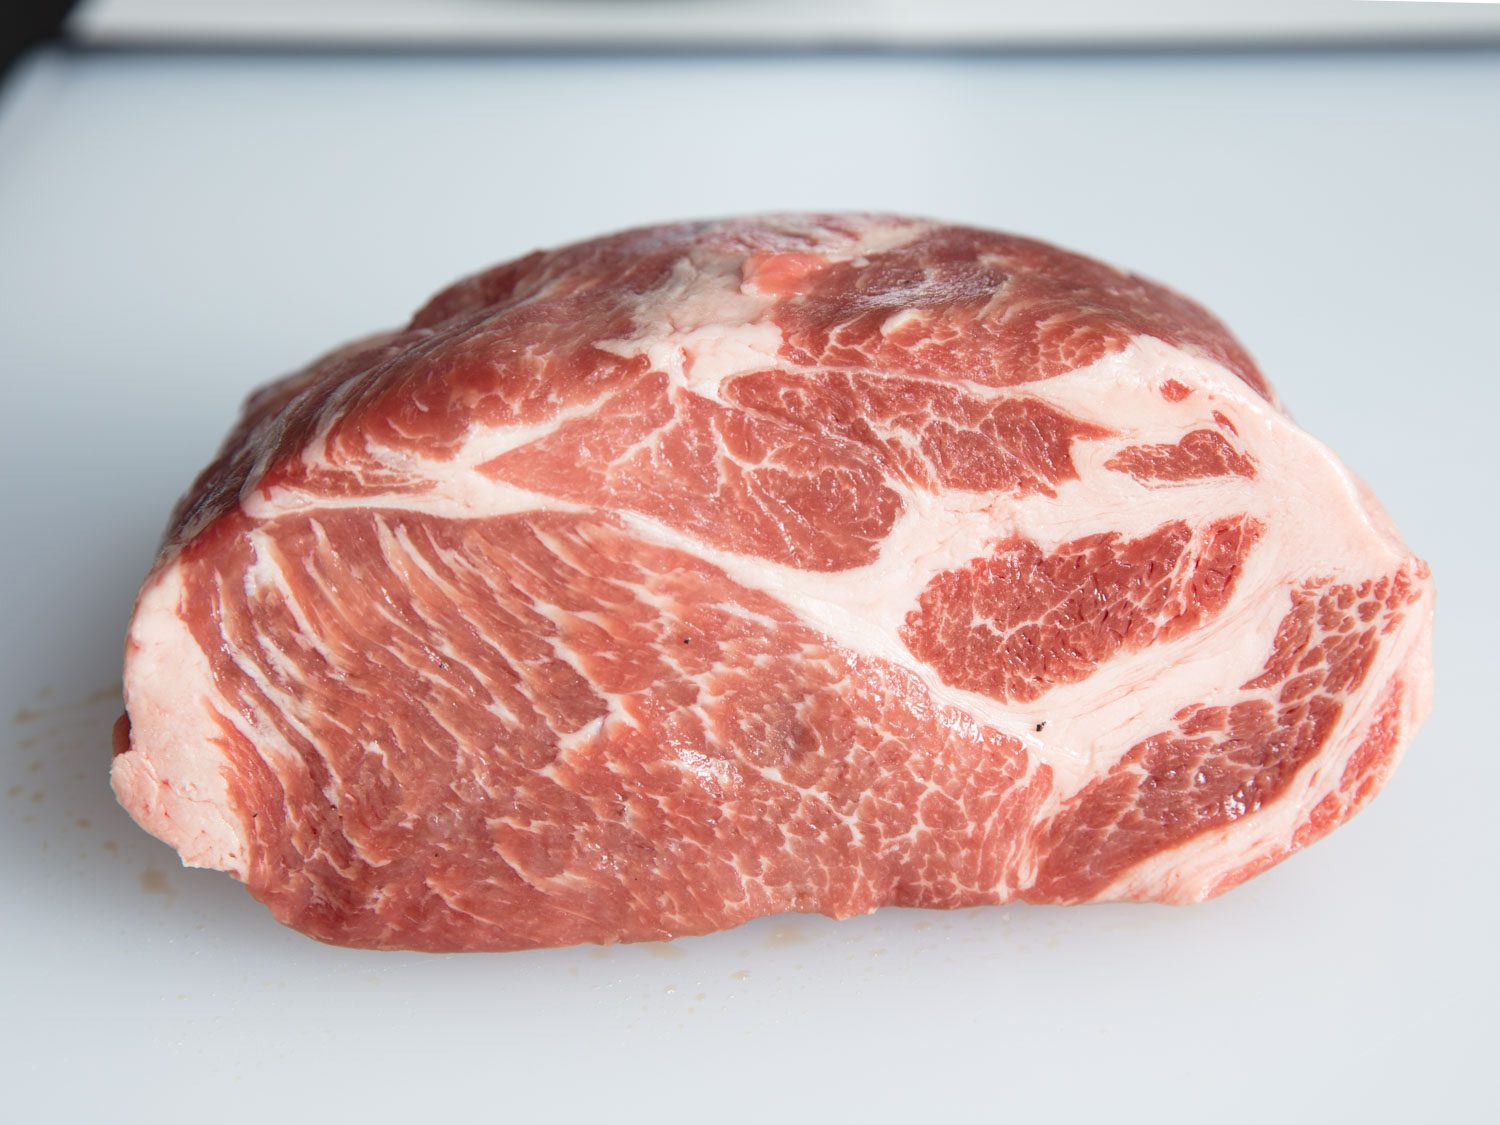
 “Muscular set corresponding to the dorsal area of the palette, located between the first cervical vertebra to the third or fourth dorsal and between the butt bone and bone palette.”
I bring that up because a good butcher, if you have access to one, can and will cut a shoulder roast for you, giving you what is perhaps the most ideal assemblage of shoulder muscles and connective tissue for chashu. Some will know what a katarosu is, but you can also say you’d like a pork collar roast, or a pork butt roast from the “money muscle,” which is what that muscle grouping is known as in barbecue circles.
Sous Vide Pork Shoulder Chashu
Sous vide is one of the best ways to tenderize tough cuts while cooking them at relatively low temperatures. Chewy collagen converts into supple gelatin very slowly at the temperatures that yield medium-rare and medium meat. What this means is that, while a pork shoulder cooked to 135°F (57°C) and then served will be relatively tough, that same shoulder brought to 135°F and held there for an extended period of time will yield exceedingly soft meat, all while retaining a rosy, medium-rare color. It’s a combination of doneness and tenderness that isn’t easily obtained using more traditional methods.
I cooked a number of pork shoulder roasts for various amounts of time at various temperatures, ranging from 135°F (medium-rare) to 150°F/66°C (medium-well), with and without a flavorful liquid similar to the kind used in Kenji’s braised-belly chashu recipe. I also did side-by-side comparisons with pork shoulder roasts that were cured overnight before going into the sous vide bath, to gauge the effects on the chashu’s final texture.
I have to admit that I find medium-rare shoulder chashu not just unappealing but a little mystifying. It seems to be something ramen shops offer more for aesthetics than for taste. I love a bit of rare or near-raw beef, but I can’t say the same for pork. As a topping for a bowl of ramen, it makes less sense still—the soup in ramen is meant to be served piping-hot, and a medium-rare slice of pork plopped on top will cook through pretty much as soon as it’s submerged in the broth. But in the interest of leaving no stone unturned, I gave it a try.
I also found that pork purchased at the supermarket or places like Costco isn’t particularly appetizing when cooked sous vide at lower temperatures. The inherent flavor of the meat is more pronounced when it’s cooked this way, as opposed to when it’s braised in flavorful liquid, and the flavor of commodity meat isn’t that great. But I did discover some useful information for further tests.
First, I found that my preference for pork cooked at lower temperatures lies squarely at 145°F (63°C). (Obviously, you may have a different preference.) Second, I found that cooking the pork with a flavorful mixture of soy sauce and mirin in the bag was preferable to cooking the pork with only salt as the seasoning.
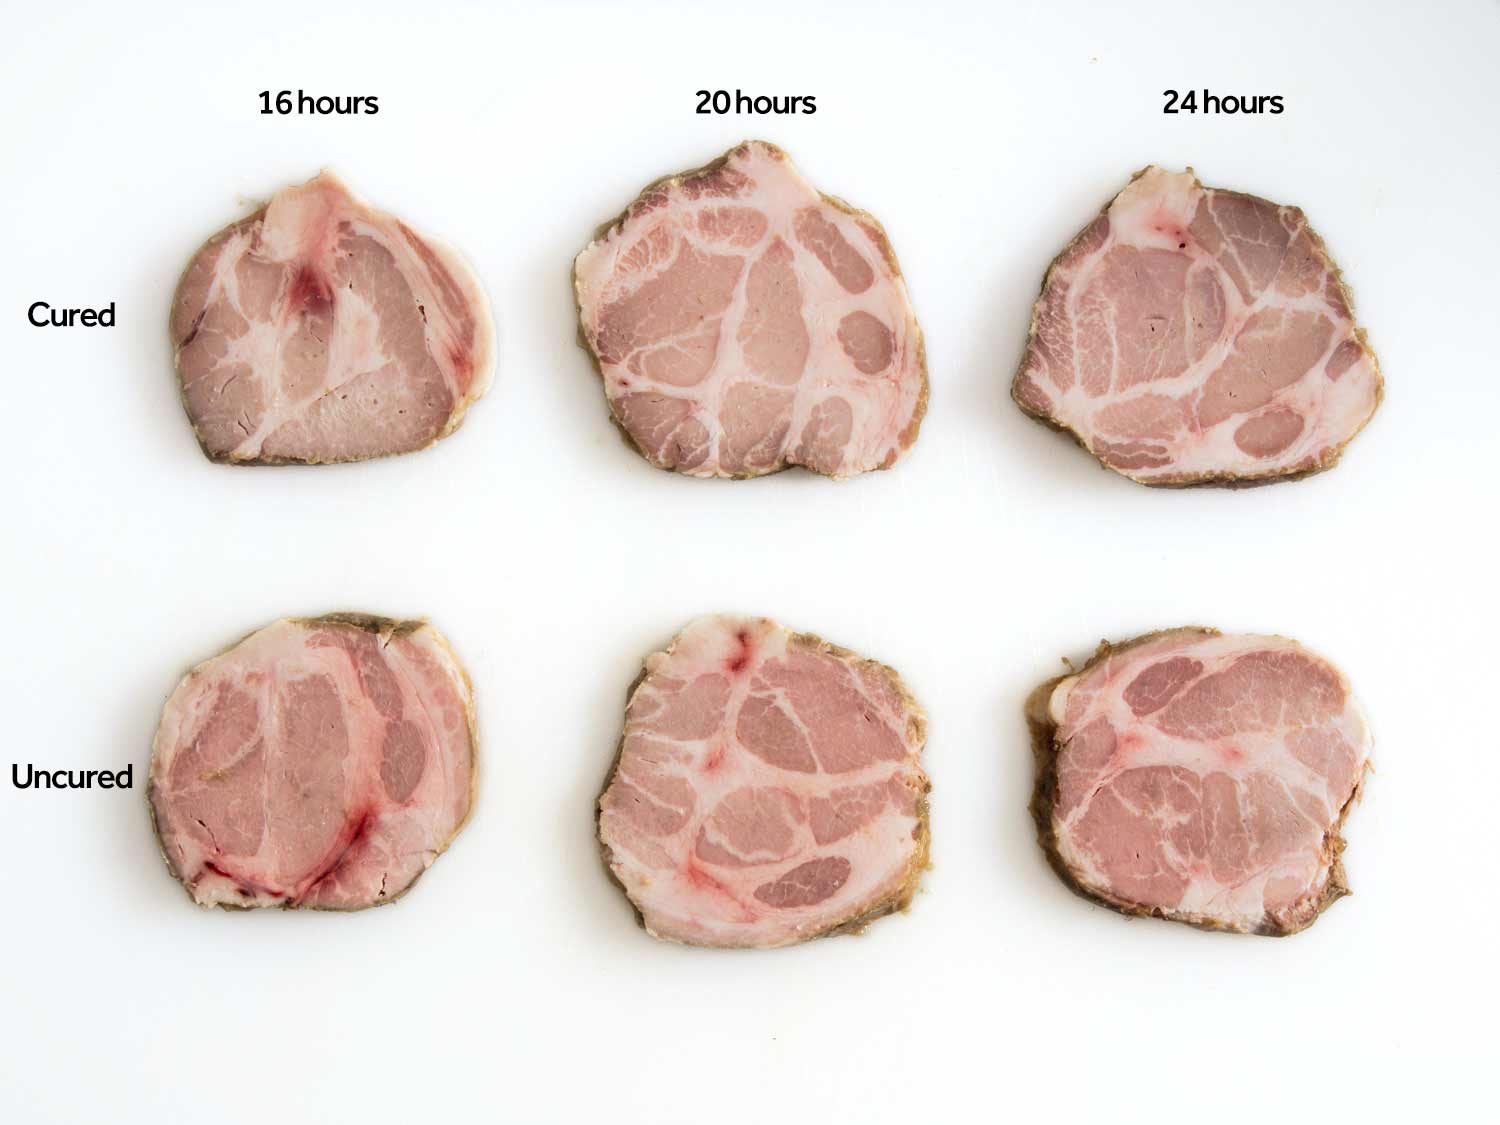 Side-by-side comparisons of cured and uncured pork shoulder, cooked sous vide at 145°F (63°C) for varying amounts of time.
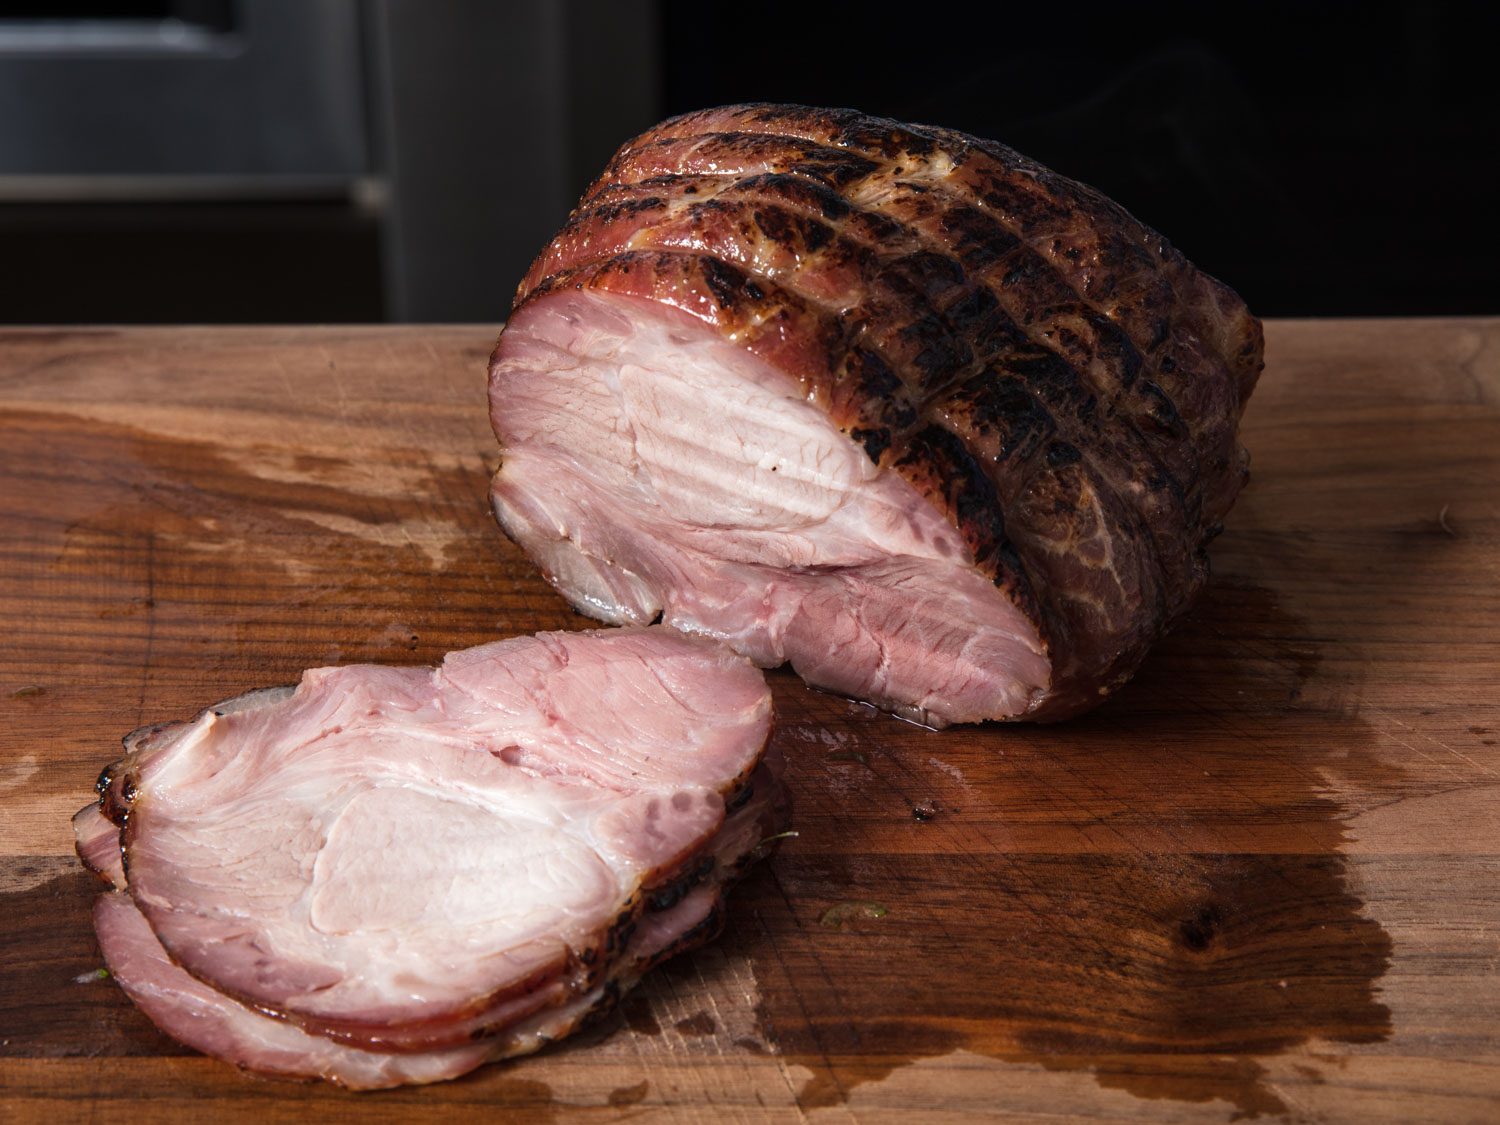
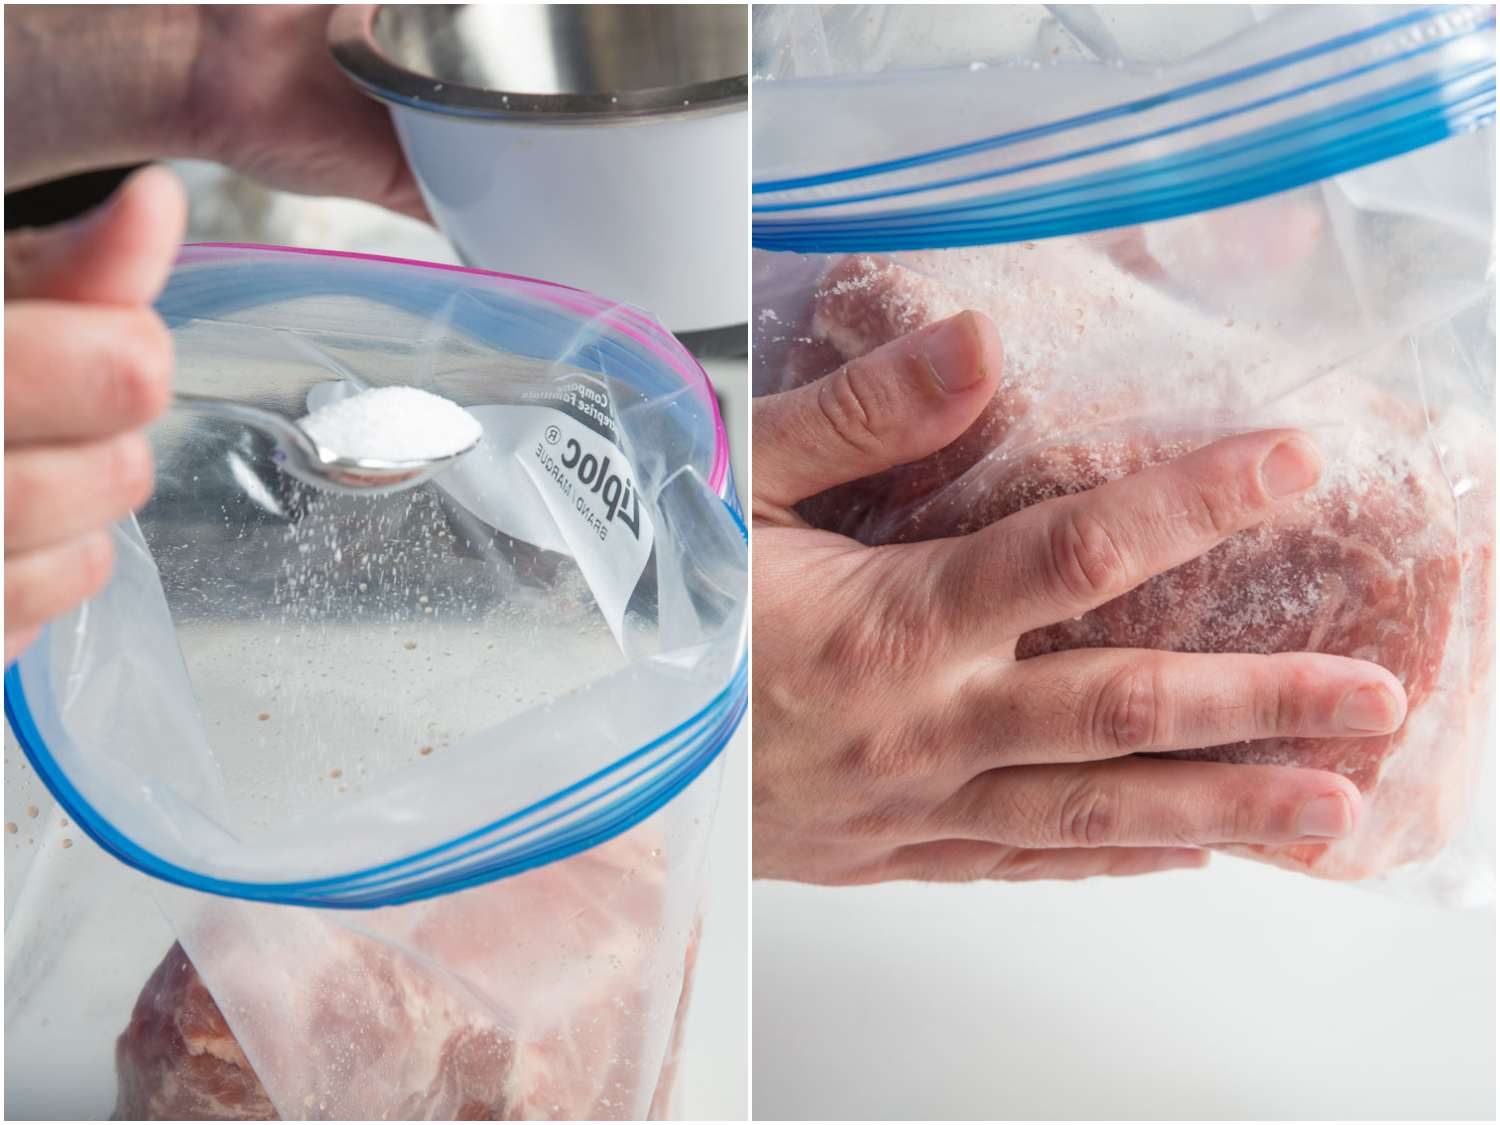
I also found that curing the pork roast overnight with a 50/50 mixture of salt and sugar (by weight) produced chashu with a better final texture. The uncured roasts had a grainy texture, while the meat from the cured roasts retained a supple consistency—admittedly closer to ham than a freshly cooked piece of meat, but much more pleasurable to eat.
Finally, I determined that, at 145°F, the pork’s texture was best when I cooked it for about 20 hours: soft and yielding, but still with some bite. (This is very similar to what Kenji found when testing sous vide pork shoulder for pulled pork—145°F for 18 to 24 hours produced moist, sliceable meat.) The roasts cooked for 18 hours or less were still unappealingly tough, particularly the large bands of fat, and the roasts cooked for 24 hours or longer were off-puttingly soft and mushy.
Of course, here, again, there’s a lot of room for personal preference. If you find the idea of meat so soft you can cut it with a spoon—or, to put it in a less appetizing way, meat so soft you can push your thumb right through it—then cooking chashu sous vide for 24 hours is probably what you want. Otherwise, you want to stay well inside the 18-to-24-hour range.
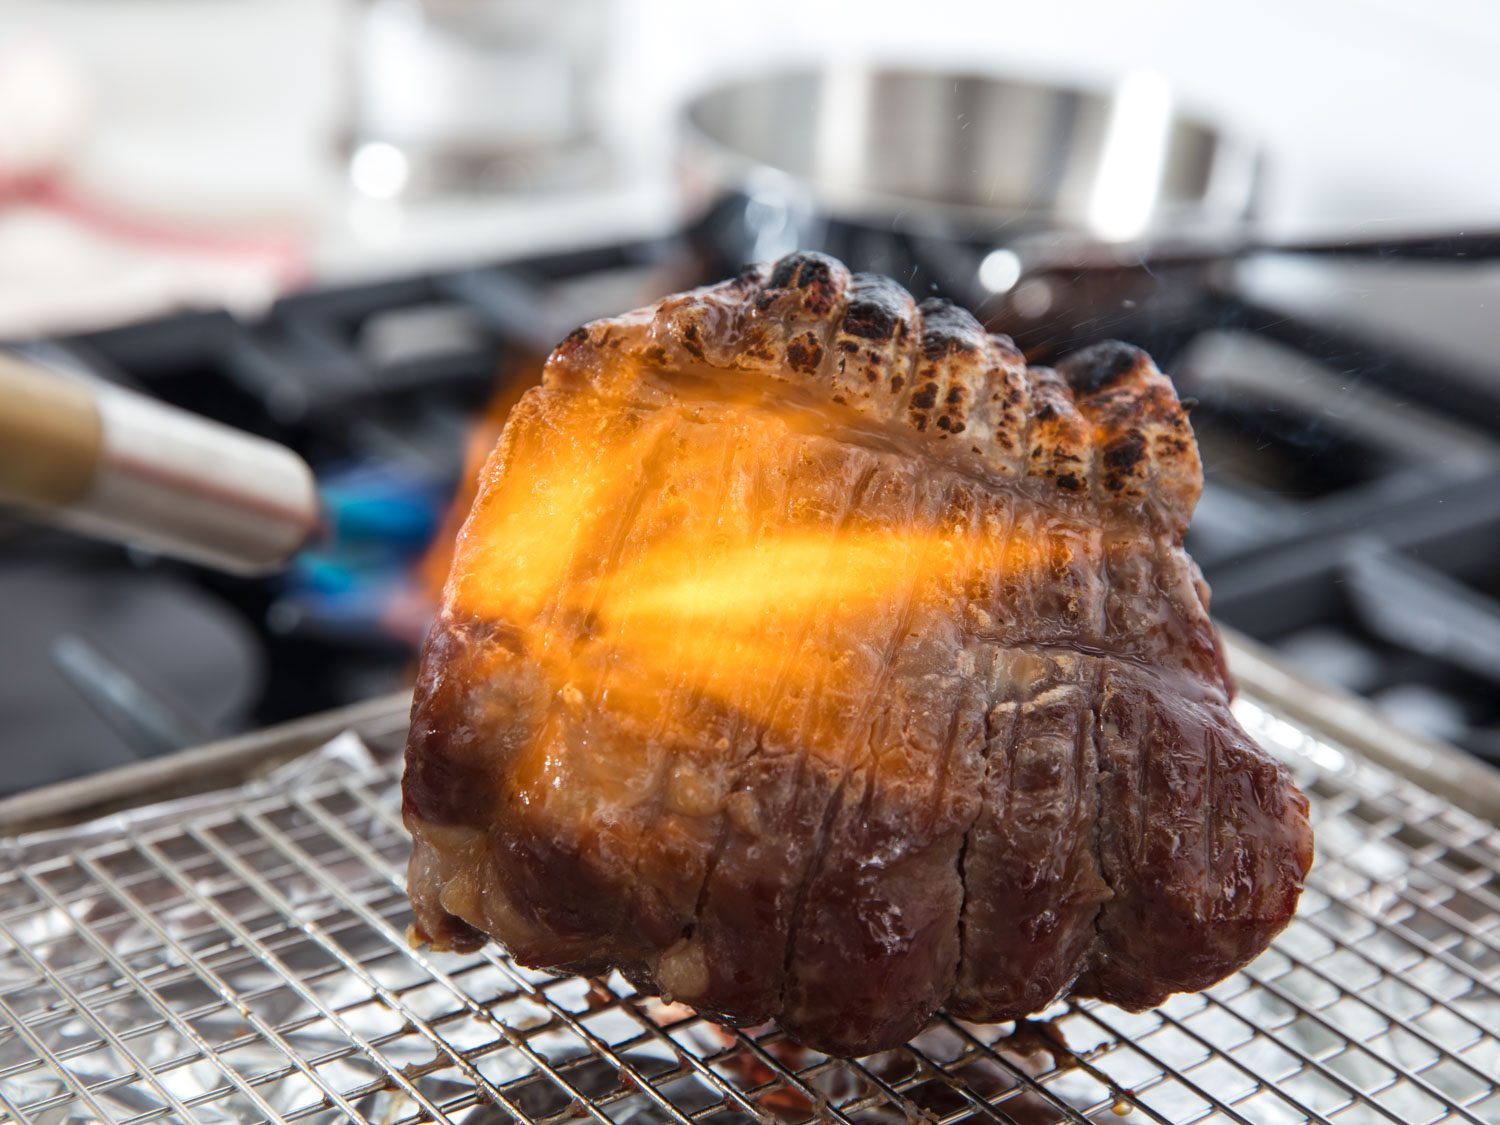
Once the bagged roasts were cooked, I dunked them in an ice bath to chill completely, then removed them, blotted off any congealed juices, and either broiled or charred them with a handheld torch. At this point, the pork can be sliced and served (see our rundown of the best carving and slicing knives for our recommended tools for the job), or wrapped up tightly in plastic for storage.
In the end, I did discover one way in which pork cooked sous vide at 145°F is inarguably superior to braised: When cut into individual serving slices and frozen, the sous vide pork keeps in the freezer better than the braised pork. This, I suppose, has to do with the fact that it’s as soft as braised meat, but cooked to a lower temperature, and as a result, its muscle fibers have not been forced to contract as dramatically.
Reverse-Searing Pork Shoulder Chashu
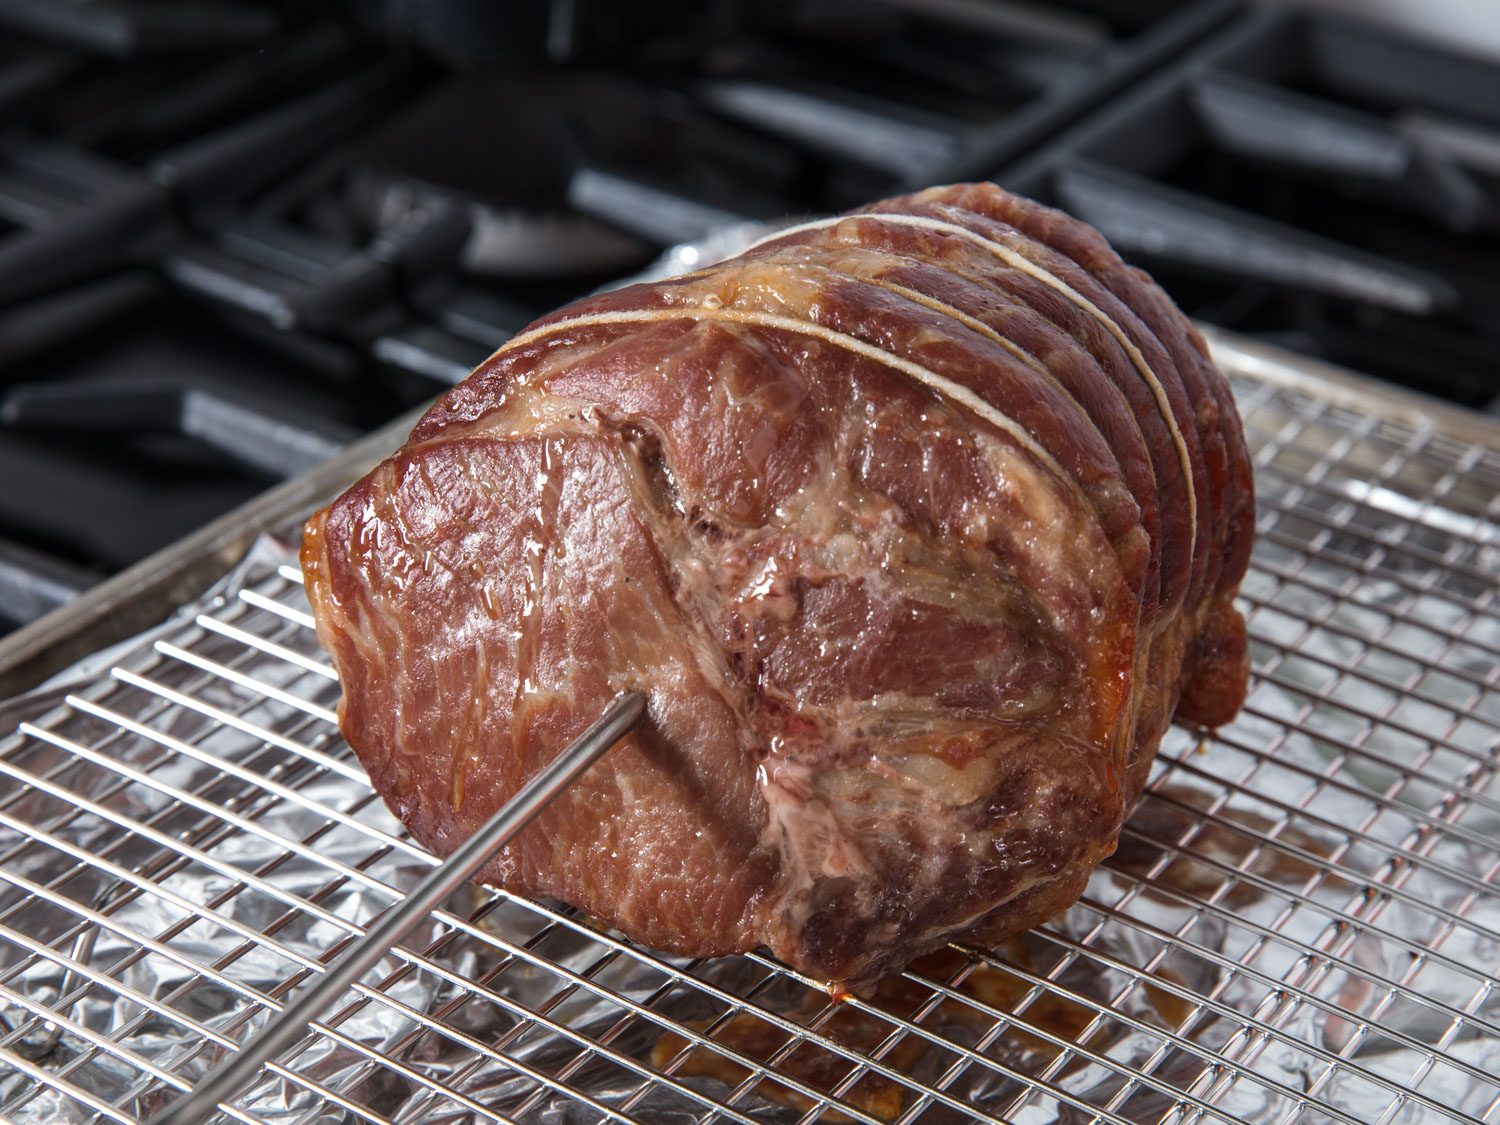 probe thermometer.
I remove the roast and either use a handheld torch to char the exterior or fire up the broiler and position an oven rack so that the roast, still sitting on the rack in a rimmed baking sheet, is about an inch from the broiler element. I turn the roast frequently as it broils, until a deep, evenly browned exterior develops.
 water-displacement method, after which you can turn the water bath into an ice bath that will quickly and efficiently chill the roast.
(If some of you out there are looking at this piece of meat and thinking, “Hey, that’s a tasso ham!”, you’re basically right, since tasso ham is pork shoulder that’s cured briefly, then hot-smoked. The primary differences between the two are that the cure for tasso ham typically contains nitrites, and the smoking temperature is a fair bit higher than 145°F.)
Alterations and Improvements
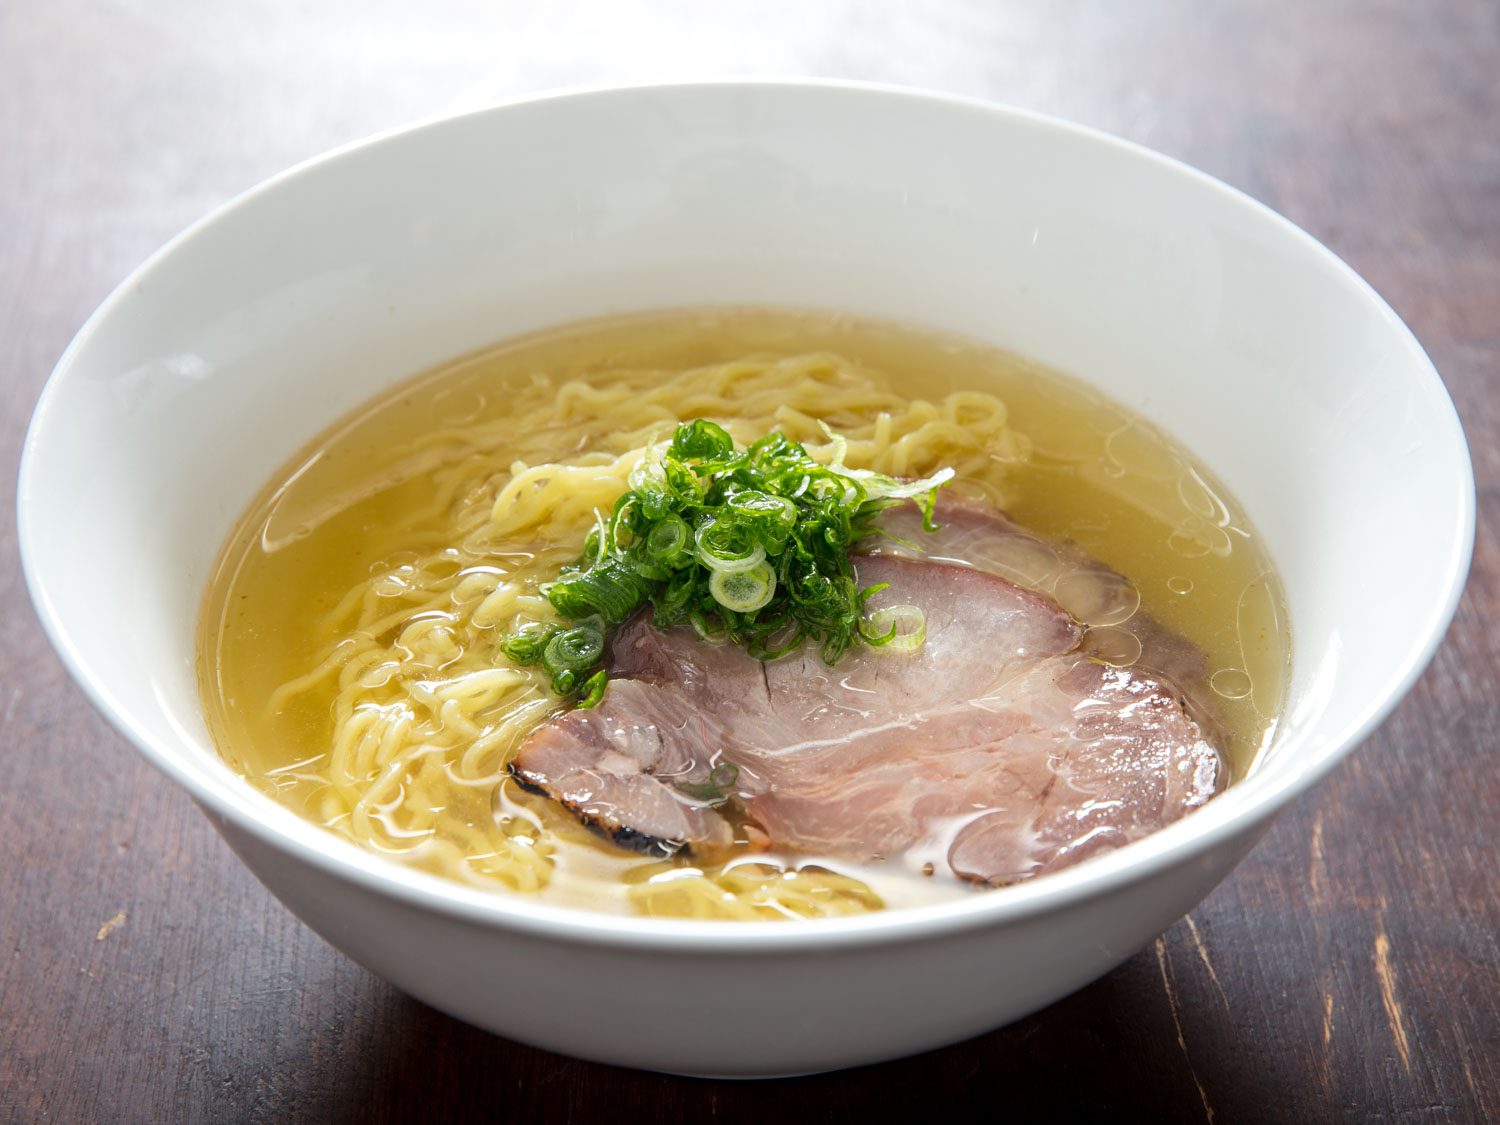 shoyu ramen, but welcome in a milder bowl of shio ramen. Sticking with traditional Japanese ramen flavor combinations is a pretty safe bet, but feel free to play around. Perhaps your ideal combination of texture and flavor is hidden among the endless possibilities.
This post may contain links to Amazon or other partners; your purchases via these links can benefit Serious Eats. Read more about our affiliate linking policy.