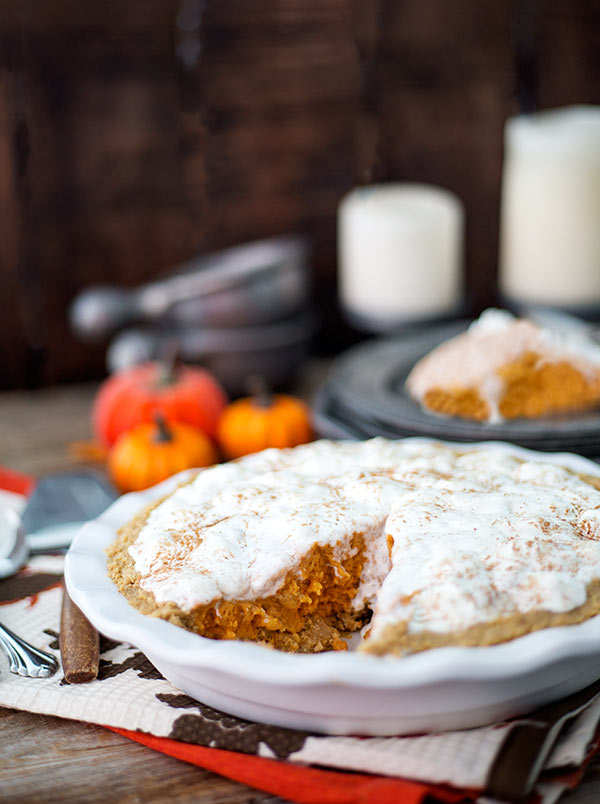
In my last blog post, we talked about what makes a pie a pie. (Well, sort of.) In this one, let’s talk about chiffon. No, not the clothing material. Chiffon, as in chiffon cake. Or in this case, I’m making a No-Bake Gluten-Free Pumpkin Chiffon Pie!
Chiffon is a method that requires folding whipped egg whites into batter. Simple as that! I’m sure there’s a more technical definition with some fancy schmancy steps written down in a giant culinary school textbook, but when you get down to it, it’s just as I said.
I decided to take the chiffon method and apply it to a holiday classic – the pumpkin pie. The result is a lighter version of traditional pumpkin pie. With a crust made from gluten-free graham cracker crumbs (I used Kinnikinnick) and a mixture heated up on the stove, this pie requires no baking, just a few hours of refrigeration. And I must say, it got rave reviews from all the Simply Gluten Free staff. A couple of them even said it was the BEST pumpkin pie they’ve ever had! So, if you need a dessert for Thanksgiving, this is an excellent choice.


Course:
Dessert
Cuisine:
American
Servings: 8 servings
Calories: 494 kcal
:
For the Crust:
-
1
(10.5-ounce) package
Kinnikinnick Graham Style Crumbs -
¼
cup
sugar -
6
tablespoons
butter
, melted
For the Filling & Topping:
-
¼
cup
water -
1
envelope unflavored gelatin -
¾
cup
sugar
, divided -
1
(14.5-ounce) can
pure pumpkin puree
(not pumpkin pie filling) -
3
large eggs
, separated -
½
cup
milk -
2
teaspoons
pumpkin pie spice
, plus more for dusting -
2
teaspoons
pure vanilla extract -
1
cup
heavy cream -
1
tablespoon
powdered sugar
For the Crust:
-
Lightly grease a 9-inch pie pan.
-
Combine the graham style crumbs with ¼ cup sugar and the butter until well combined. Press firmly into the prepared pan and refrigerate while making the filling.
For the Filling & Topping:
-
Mix the water and gelatin in a small bowl and let sit for 5 minutes.
-
In a medium saucepan, combine ½ cup sugar, pumpkin puree, 3 egg yolks, milk, and pumpkin pie spice. Heat over medium heat, stirring frequently, until mixture is hot and thick, about 5 minutes. Do not let boil. Remove from heat, stir in the vanilla and gelatin, and let cool to room temperature. Do not refrigerate at this point.
-
Once the pumpkin mixture has cooled, beat the egg whites in a separate bowl until foamy with an electric mixer. Slowly add in ¼ cup sugar and beat until stiff peaks form. Stir a large dollop of the egg whites into the pumpkin mixture, then fold in the rest. Spoon the mixture into the pie crust, smooth the top, and refrigerate until set, at least 4 hours.
-
Before serving, whip the cream and powdered sugar until soft peaks form. Spread or pipe onto the pie, dust with some pumpkin pie spice, and serve.
Nutrition Facts
No-Bake Gluten-Free Pumpkin Chiffon Pie
Amount Per Serving
Calories 494
Calories from Fat 225
% Daily Value*
Total Fat 25g
38%
Saturated Fat 13g
65%
Cholesterol 126mg
42%
Sodium 366mg
15%
Potassium 236mg
7%
Total Carbohydrates 60g
20%
Dietary Fiber 2g
8%
Sugars 37g
Protein 7g
14%
Vitamin A
176.2%
Vitamin C
3%
Calcium
9.5%
Iron
14.7%
* Percent Daily Values are based on a 2000 calorie diet.
The views and opinions expressed on this blog are purely the blog owner’s. This blog accepts free manufacturers’ samples and forms of cash advertising, sponsorship, paid insertions or other forms of compensation. Affiliate links may be included in this post.
Disclaimer: All nutrition facts on Simply Gluten Free are meant only as a guide and may differ depending on product brands used or ingredient substitutions. Some errors may occur, so you are encouraged to confirm the recipe’s ingredient and nutrition suitability for your own diet.
Have you tried this recipe? Give it a star rating and let us know your thoughts in the Ratings & Reviews section below.
Source link